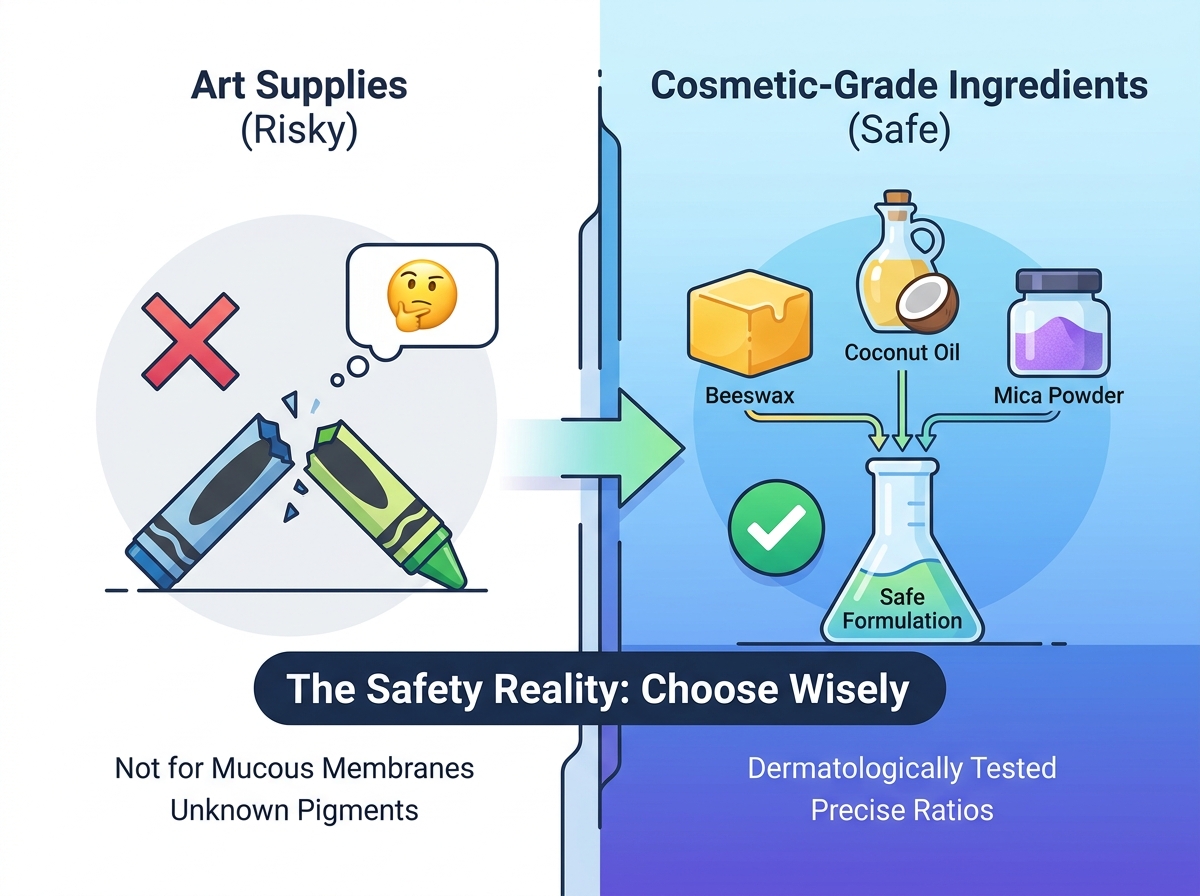
Customizable beauty continues to rise rapidly. DIY cosmetics empower you to create exact shades and textures. Many enthusiasts specifically desire the unique format of a lip crayon. It perfectly blends the precision of a liner and the rich color payoff of a traditional lipstick. However, a problematic trend often shadows this DIY excitement. Countless online tutorials suggest melting standard children's wax crayons to make lip colors. We must address this immediately. Art supplies do not belong on your mucous membranes. This guide provides a credible, safety-first evaluation of cosmetic materials. We will explore a transparent, step-by-step formulation process. You will learn how to source safe, cosmetic-grade alternatives. We also cover comprehensive DIY kits for beginners. By the end, you will understand exactly how to formulate a high-quality product safely. Creating your own cosmetics should never compromise your well-being. Proper formulation requires precision and knowledge.
Key Takeaways
Standard "non-toxic" children's crayons are not FDA-approved for cosmetic use on mucous membranes; cosmetic-grade waxes and pigments are the industry standard for safe DIY formulations.
The ideal lip crayon requires a precise ratio of hard waxes (for structure and pencil-sharpening ability) to carrier oils (like coconut or jojoba) for glide and hydration.
Formulators can choose between sourcing raw, bulk ingredients or utilizing pre-measured DIY lip crayon kits based on production volume and budget constraints.
Temperature control and rapid molding are the most critical operational variables in avoiding grainy textures or pigment separation.
The Safety Reality: Art Supplies vs. Cosmetic-Grade Ingredients
The Problem with the "Crayola" Method
Online beauty communities frequently debate ingredient safety. Reddit makeup forums often feature viral posts showing users melting standard coloring crayons. These users mistakenly equate the label "non-toxic" to cosmetic safety. This assumption creates significant health hazards. Ingestion safety differs vastly from dermatological safety. Art supplies undergo testing for accidental swallowing by children. Manufacturers do not test them for prolonged contact on highly absorptive mucous membranes. Lips lack the protective stratum corneum found elsewhere on your face. This makes them highly vulnerable to chemical absorption. Using art supplies as makeup bypasses critical cosmetic safety standards.
Compliance and Sensitization Risks
Creating cosmetics from unverified art supplies introduces severe sensitization risks. Contact dermatitis remains the most common adverse reaction. Standard crayons contain industrial dyes and synthetic fragrances. Manufacturers never intend for these chemicals to sit on delicate skin tissue. Furthermore, art supplies lack appropriate preservative structures for moisture exposure. Once you melt them and apply them to your face, bacteria can easily flourish. Cosmetic regulations strictly govern heavy metal limits in pigments. Art supplies do not follow these stringent cosmetic guidelines. You risk exposing yourself to unverified colorants every time you apply a crayon-based mixture.
The Professional Alternative
You must establish a baseline of cosmetic-grade ingredients. Professional alternatives guarantee safety and superior performance. Real makeup relies on purified bases like cosmetic beeswax or carnauba wax. These natural waxes provide stability and skin-conditioning benefits. To achieve vibrant colors, you need cosmetic-grade mica powders and iron oxides. Suppliers rigorously test these ingredients for heavy metals and skin safety. By choosing professional components, you create a product matching retail quality. You protect your skin while enjoying a highly saturated, beautiful finish. Cosmetic ingredients remain the only viable option for safe DIY makeup.
Core Formulation: Ingredients and Tool Evaluation
The Structural Base (Waxes)
The core of any solid cosmetic is its wax base. The wax determines the melting point and physical stability. You must balance hardness and spreadability. Beeswax offers a reliable, flexible base. It melts smoothly and holds moisture well. Candelilla wax provides a vegan alternative. It yields a glossier finish and slightly firmer texture. Carnauba wax is the hardest option available. You need carnauba to maintain a sharp point on your final product. We recommend blending these waxes for optimal results.
Wax Structural Properties Comparison
Wax Type
Origin
Melting Point
Structural Contribution
Beeswax
Animal (Bee)
61°C - 65°C
Provides flexibility and smooth application.
Candelilla Wax
Plant-based
68°C - 73°C
Adds gloss and moderate firmness.
Carnauba Wax
Plant-based
82°C - 86°C
Ensures high rigidity for sharpening.
The Emollients (Oils & Butters)
Emollients dictate how the product feels on your skin. They provide hydration and control the glide of the pencil. Fractionated coconut oil remains a top choice. It absorbs rapidly and resists rancidity. Jojoba oil closely mimics human sebum, making it highly compatible for sensitive lips. You also need heavier butters for a protective barrier. Shea butter offers deep nourishment. Cocoa butter adds a distinct firmness and a subtle scent. You must balance liquid oils and solid butters carefully. Too much oil makes the pencil too soft. Too much butter causes a dragging sensation.
The Pigment Delivery System
Coloring your mixture requires specialized delivery systems. Cosmetic-grade micas offer a beautiful range of shimmering and pearlescent shades. They blend easily into melted waxes. For flat, opaque colors, iron oxides work best. Liquid colorants suspended in castor oil also provide excellent payoff. They prevent the dreaded powdery texture. Always verify your pigments are designated as lip-safe. Some ultramarine blues and chromium greens are safe for eyes but not for lips. Proper dispersion ensures a smooth, non-streaky application.
Hardware Requirements
You cannot formulate properly without the right equipment. Precision tools prevent burning and ensure sanitary conditions.
Double Boiler: Essential for gentle, indirect heating. Direct heat destroys waxes and butters.
Heat-Safe Glass Beakers: Allow for easy pouring and clear visibility of melting progress.
Precision Scale: Measures ingredients in grams for exact replication.
Glass Stirring Rods: Mix pigments smoothly without introducing air bubbles.
Empty Jumbo Molds: Shape the mixture into the classic pencil format.
Step-by-Step Implementation: How to Make a Lip Crayon
Phase 1: Sanitization and Prep
Hygiene dictates the shelf life of your cosmetic. Natural formulations lack powerful synthetic preservatives. You must sanitize everything before beginning. Wipe down your entire workspace using 70% isopropyl alcohol. Submerge your glass beakers, stirring rods, and molds in warm, soapy water. Rinse them thoroughly and spray them generously with alcohol. Let all equipment air dry completely. Even a single drop of water can ruin your wax mixture. Lay out all your pre-measured ingredients. Preparation ensures you can move quickly once the wax melts.
Phase 2: Melting and Blending
Creating a balanced lip crayon requires a fundamental ratio. A standard baseline is one part wax, one part butter, and one part oil. Fill the bottom pan of your double boiler with two inches of water. Bring it to a gentle simmer. Place your heat-safe beaker inside. Add your hardest waxes first, such as carnauba. Once they melt slightly, add your beeswax and solid butters. Finally, stir in your liquid carrier oils. Remove the beaker from the heat once everything turns clear. Quickly whisk in your chosen pigments. Stir continuously to prevent clumping. Ensure no dry powder remains visible at the bottom of your beaker.
Phase 3: Pouring and Setting
Pouring requires speed and temperature awareness. If the mixture cools too much, it will clump in the beaker. If you pour it too hot, it might warp plastic twist-up tubes.
Monitor the temperature. Wait until the liquid cools slightly but remains fully fluid.
Hold your empty molds or tubes perfectly upright.
Use a disposable pipette for precise control. Draw up the liquid mixture carefully.
Fill each mold slowly to prevent air bubbles from forming inside the shaft.
Stop filling just below the rim to allow for slight expansion as it cools.
Phase 4: Curing
Patience remains crucial during the final phase. The wax structure needs time to crystallize and stabilize. Do not move the molds while they are warm. Let them sit undisturbed at room temperature for at least two hours. Moving them prematurely causes internal cracking. For the best structural integrity, allow a full 24-hour resting period. This curing time ensures the waxes harden completely. A fully cured product sharpens cleanly without crumbling. Once set, you can twist up the tube or sharpen the wooden casing for immediate use.
Modifying the Formula: Liners, Glosses, and Mattes
Creating a Firmer Lip Liner
Sometimes you need precise definition rather than broad color. A firmer texture prevents the color from bleeding into fine lines. To achieve this, you must adjust your core ratio. Increase the percentage of hard waxes significantly. Double the amount of carnauba wax in your formula. Simultaneously, decrease the liquid oils by half. This reduces the slip of the product. The resulting formula will feel slightly stiffer upon application. It will hold a sharp point beautifully, allowing you to trace the edges of your mouth with complete accuracy.
Creating a Lip Gloss Crayon
If you prefer a sheer, hydrating finish, modify your emollients. A glossy finish requires higher light reflection. Substitute your solid butters completely. Replace them with high-viscosity liquid oils. Castor oil works exceptionally well for this purpose. It imparts a natural, heavy shine that clings to the skin. Keep your wax ratio just high enough to maintain a solid shape. The product will melt instantly upon contact with your body heat. You will achieve a sheer wash of color and intense hydration.
Creating a Matte Finish
Matte textures offer incredible longevity and high pigment grip. However, natural waxes and oils inherently produce shine. You must introduce texturizing agents to absorb this excess oil. Kaolin clay is an excellent cosmetic additive for this purpose. Arrowroot powder also works effectively to mattify the base. Add these dry powders during the pigment blending phase. Start with small amounts, whisking vigorously. Too much powder makes the pencil brittle and chalky. A balanced addition reduces shine while keeping the application smooth and comfortable.
Sourcing Strategy: Evaluating DIY Kits vs. Scratch Formulation
All-in-One DIY Kits
Beginners often find formulation overwhelming. Pre-packaged kits offer a streamlined introduction. You can find these at natural cosmetic retailers or essential oil brands.
Pros: Kits provide pre-measured ratios. They guarantee cosmetic-grade safety right out of the box. They lower the barrier to entry by removing the guesswork.
Cons: The cost-per-unit is noticeably higher. You have limited shade customization options. You rely entirely on the manufacturer's chosen textures.
Bulk Raw Material Sourcing
Dedicated formulators eventually shift to buying individual components. This approach unlocks total creative freedom.
Pros: You gain full control over every aspect of the formulation. It offers a much lower long-term cost. The process becomes highly scalable if you plan to sell.
Cons: It requires upfront investment in hardware like scales and double boilers. You must endure iterative testing to find the perfect formula. Storage space becomes a necessity for bulk ingredients.
Shortlisting Logic
Determine your primary goal before purchasing supplies. If you just want a fun weekend project, buy an all-in-one kit. Kits let you test the proof-of-concept without a major financial commitment. If you plan to produce multiple batches, source bulk raw materials. Bulk sourcing makes sense for hobbyists seeking exact shade matches. It is also mandatory for users planning to start independent cosmetic lines. Evaluate your budget, available time, and desired level of involvement to make the best choice.
Conclusion
Formulating custom cosmetics provides immense creative satisfaction. It remains a highly accessible process when approached correctly. However, ingredient safety and precise structural ratios ultimately dictate your success. Art supplies simply cannot replace cosmetic-grade waxes and purified pigments. Remember to balance your hard waxes and emollients carefully. Control your melting temperatures to avoid grainy textures. Now, determine your commitment level. Purchase a beginner-friendly kit if you want immediate results. Alternatively, gather cosmetic-grade bases and molds for your very first scratch-formulated test batch. Your perfect custom shade awaits.
FAQ
Q: Is it safe to make a lip crayon out of standard coloring crayons?
A: No. Standard art supplies are tested for non-toxicity upon accidental ingestion, not for prolonged dermatological contact. They lack cosmetic-grade certification and often contain unverified synthetic dyes. These chemicals can cause severe contact dermatitis when applied directly to absorptive mucous membranes.
Q: How long does a homemade lip crayon last?
A: Homemade formulations typically last 6 to 12 months. Because they lack broad-spectrum synthetic preservatives, the natural oils and butters will eventually oxidize. Discard the product immediately if you notice changes in smell, texture, or separation, as this indicates rancidity.
Q: Why is my DIY lip crayon grainy?
A: Graininess usually results from poor temperature control. Overheating solid butters, particularly shea butter, causes their fatty acids to crystallize unevenly upon cooling. Cooling the mixture too slowly can also cause pigments to separate and clump. Always melt gently and cool rapidly.
Q: Can I use food coloring to tint my lip crayon?
A: No. Standard food coloring is water-based. It will repel the oil and wax base of your cosmetic, causing the mixture to separate completely. You must use oil-dispersible colorants, cosmetic-grade micas, or iron oxides to achieve a smooth, uniform tint.
Guangzhou Vast Cosmetic Co.,Ltd. was established in 2018, a high-tech enterprise focusing on customizing make-up for customers, integrating scientific research, production, sales and service.